When it comes to increasing the size of an EBS volume, AWS provides clear options and documentation for that. But what happens when you were optimistic about the usage of your root EBS volume or you’ve now moved most of your data to S3, Glacier or EFS? AWS doesn’t give you the option to downsize your root EBS volume but luckily there’s a workaround; we can just replicate our (large) volume into a smaller one, and use that as a replacement. This post is a thorough break down of all the necessary steps you need to take in order to do that:
- Before you even think about starting, get a snapshot of the volume you want to downsize.
- Make sure you read the first step and get a snapshot of the volume you want to downsize (I think it’s clear now that you need to backup everything and get a snapshot :P).
- Stop the instance that the volume is attached to
- Detach the volume from the instance. For the sake of this how-to, we’re gonna call this the “old volume”
-
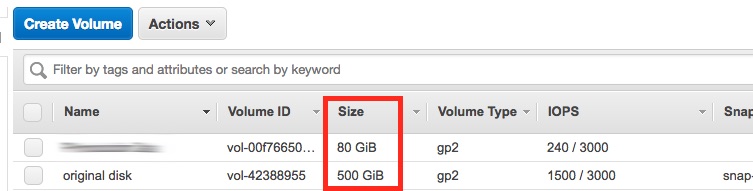
Create an EBS volume of the desired size, and we’re gonna refer to this as the “new volume”. In the image, you can see I have the 500GB volume I need to downsize to 80GB.
- Launch a new EC2 instance. A t2.micro or even a t2.nano would do, and make sure have the right SSH keypair, so you can connect to the instance, which we’ll call the “new instance” from now on.
- Connect to the new instance via SSH.
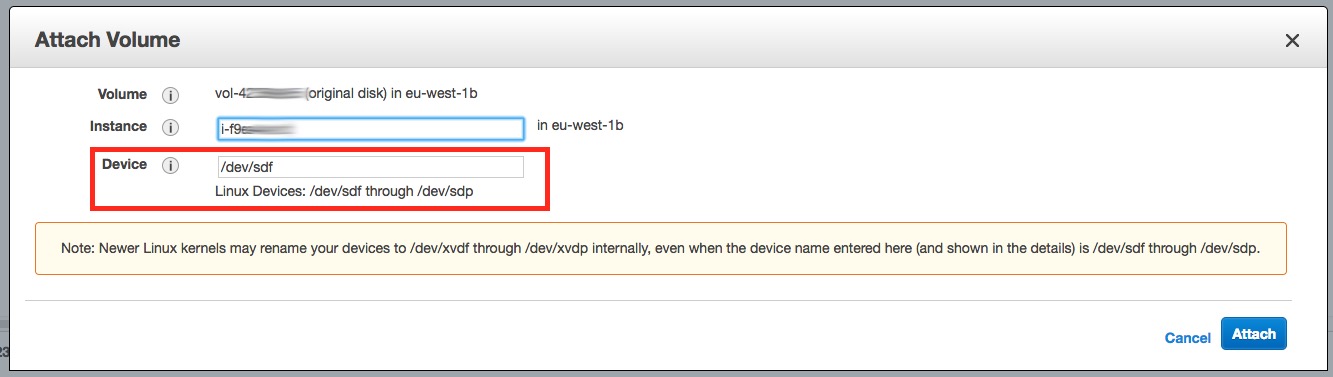
- By using the AWS Console, attach the volumes to the new instance as follows:
- The old volume as
/dev/sdfwhich in the new instance will become/dev/xvdf - The new volume as
/dev/sdgwhich in the new instance will become/dev/xvdg
- The old volume as
- Make sure the file system you’re trying to resize is in order by running
sudo e2fsck -f /dev/xvdf1. If you’re resizing a different partition on the drive, change the number 1 to the partition number you wish to resize. - If any errors came up via the
e2fsckcommand, head over to this page to get the right command for the fix. Don’t panic :) - We now need to shrink the filesystem to its lowest possible. This process is key for us because we’re gonna use
ddto copy the contents of the old volume bit by bit. Run:sudo resize2fs -M -p /dev/xvdf1(or change the “1” to your corresponding partition) and make a note of the last line it will print. It will take some time, but the last line would eventually look something like:
The filesystem on /dev/xvdf1 is now 28382183 (4k) blocks long. - Convert the number of 4k blocks that the
resize2fscommand printed into MB and round it up a bit, for example 28382183 * 4 / 1024 ~= 110867, so round it up at 115000. - Copy the entire old volume device (not just the partition) to the new volume device, bit by bit so that we’re certain we have both the partition table & data in the boot partition:
sudo dd if=/dev/xvdf of=/dev/xvdg bs=1M count=110867This is going to take a few minutes, you might as well make some coffee & read a book in the meantime.
- You might think (as I did) that we’re done, but we’re not. You need to follow the next steps in order for your volume to be bootable. Otherwise you’d waste time trying to boot from this volume (as I did). The important thing here, is to use
gdiskin order to create create the partition table:- Fire up
gdiskin order to start fixing the GPT on the new volumesudo gdisk /dev/xvdgYou’ll get a greeting message and you’ll be navigating to your menus by entering letters from now on. You can hit
?if you require help at any point. - Hit
xto go to extra expert options - Hit
eto relocate backup data structures to the end of the disk, then hitmto go back to the main menu - Hit
ito get the information of a partition, then1(the number one) to get the information for the first partition on the device - It would look something like that:
  Partition GUID code: 0FC63DAF-8483-4772-8E79-3D69D8477DE4 (Linux filesystem)
  Partition unique GUID: DBA66894-D218-4D7E-A33E-A9EC9BF045DB
  First sector: 4096 (at 2.0 MiB)
  Last sector: 1677718200 (at 80.0 GiB)
  Partition size: 1677308700 sectors (80.0 GiB)
  Attribute flags: 0000000000000000
  Partition name: 'Linux'
Copy the GUID under the
Partition unique GUIDlabel, (eg.DBA66894-D218-4D7E-A33E-A9EC9BF045DB) and thePartition Name(eg.Linux) - Hit
dand then1(the number one) to delete the partition, followed bynand1in order to create a new partition on the device - You’ll be asked what your first sector would be, add
4096, then follow the defaults (let it allocate the rest of the disk), then add8300as the type (Linux Filesystem) - Change the partition’s name to match the information you’ve printed before by hitting
c, then1(for the first partition) and then add the name that the partition previously had (in our exampleLinux) - Next, change the partition’s GUID by hitting
x(to go to the expert menu),c, then1(for the first partition), then add thePartition unique GUIDthat the partition previously had (in our exampleDBA66894-D218-4D7E-A33E-A9EC9BF045DB). - We’re almost done: go back to main menu by hitting
m, theniand then1. You should get something like what was printed before except now thePartition sizeshould differ. If the Partition unique GUID or the Partition name are different, hitqand start over. - If everything’s set, hit
win order to write the partition table to the disk,yfor confirmation and you’re (finally) done! - Now expand your file system because we’ve shrunk it on step 11 by running:
sudo resize2fs -p /dev/xvdg1
- Fire up
- Done! Detach both volumes, create a snapshot of the new volume and attach it to the old instance as
/dev/xvda(root volume). - Keep the old volume around for some time, and only delete it after you’re 100% certain that everything is in place. The new instance can be safely terminated though, once your old instance boots up with the new volume.
Bonus (panic) points
If you are dealing with PVM image and encounter following mount error in instance logs
Kernel panic - not syncing: VFS: Unable to mount rootwhen your instance doesn’t pass startup checks, you may probably be required to perform this additional step. The solution to this error would be to choose proper Kernel ID for your PVM image during image creation from your snapshot. The full list of Kernel IDs (AKIs) can be obtained here. Do choose proper AKI for your image, they are restricted by regions and architectures!
(from StackOverflow)